Wednesday, May 09, 2007

Garden Update


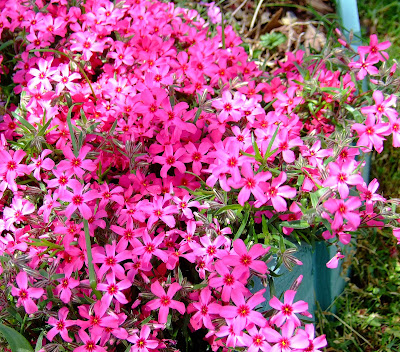
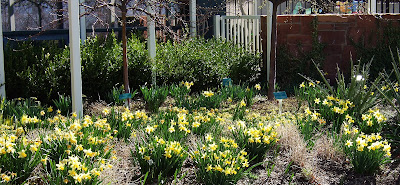
The garden is really in full Spring swing now. It's early for the columbines to be so prolific, but it's been a weird season. Incredibly dry days for New Jersey in April and early May, but I've been watering faithfully. Here are some of the results:


Between the red, yellow, fuschia and purple primulae; the pink and lilac creeping phlox; the red shooting star columbines (as well as the white, blue and pink Colorado ones); and the bright blue forget-me-nots, this is the most colorful May presentation yet!

Now, if the irises will get their acts together, I'll be happily suprised.

On the back deck, the petunias are faring well with nearly daily waterings. I've had to spray deer-be-gone around the outside of the deck to keep the squirrels away, but it seems to be working. John and I ate lunch on the deck yesterday for the first time in a year. The weather couldn't be better!

Wednesday, May 02, 2007

Mom’s Rude Soup


Although there's no arguing that spring has most decidedly sprung, there's still a chill at night. The best thing to warm the bones on a chilly night is a mug or bowl of Mom's Root Soup.

Besides chilly mid-spring nights, this dish has also become Mom’s Passover mainstay. She kindly switched to a vegan soup after I had become vegetarian many years ago. She also switched to a vegetarian matzo ball recipe that doesn't use chicken ingredients at all. Regarding matzo ball recipes, Mom uses the one on the box/can of matzo meal and recommends it highly.

The name of this entry is a play on words since the recipe is mainly fashioned from root vegetables. Sometimes, this has a noticeable effect on select individuals, hence the name. However, it’s a very tasty dish, and I’ve chosen not to veer from Mom’s recipe at all to honor her cooking style and concern for my step-dad Dave’s health. They do not cook with salt due to his high blood pressure, so if you do (I do!), please salt and pepper the soup to suit your tastes.

Finally, Mom usually makes this soup a few days before it’s meant to be eaten. However, there’s nothing stopping you from enjoying it right after you make it. If you decide to make it ahead for a big dinner, add 4 cups of vegetable broth before heating for 1 hour before serving.

Ingredients:

1/2 teaspoon garlic powder
1/4 teaspoon dried marjoram
1/2 teaspoon dried thyme
1/2 teaspoon paprika
1 tablespoon vegetable oil
4 leeks (well cleaned of all sand)
1 large rutabaga
1 parsnip
1 potato
7 cups water
1/4 cup barley

Directions:

1. Heat the oil and the spices in a large stock pot over low heat.
2. Cut the leeks into 1/2 in. size slices, excluding the rough dark green parts at the ends. Discard the ends.
3. Add the leeks to the pot and cover. Cook for 5 minutes or until soft and turn off the heat under the pot.
4. Cut the rutabaga into 1 in. squares.
5. Cut the parsnip into thirds.
6. Cut the potato into 1 in. squares.
7. Add all the vegetables and turn the heat back on to medium high under the pot.
8. Add the water and barley.
9. When the soup is bubbling, lower to a simmer and cover for 1 1/2 hours.
10. Enjoy or store in the fridge until your big dinner.

This soup easily feeds 10, especially with matzo balls.

Thursday, April 26, 2007

Garden Update


I took these photos two days ago, and already I have more plants that have blossomed. I blame this crazy spring weather in NJ these days. As you can see from the vibrant bunches in the lower two quadrants, the primulae are happily blooming away. I have quite a few different shades of purple, blue and red primulae that just keep coming back year after year. Not shown here are the brilliant yellows planted just in front of the lillies that take over once it stays hot instead of this hot/cold/rain/drought time of April.

The top two photos show some of the newer plantings. On Sunday, Mom and I each bought those peach and purple "Johnny-Jump-Ups" in the upper right quadrant. I'm not sure where she's planted hers yet, but I did take some photos of the orchids in her greenhouse that I'll be posting when she identifies them for me.

Finally, in the top left quadrant, you can see a sample of the plantings I did in the container gardens for Earth Day. Just wish my town would recycle the plastic containers the plants sit in before they're planted in my garden.

Monday, April 23, 2007

Product Review: Blue Silicone Rolling Pin


In an effort to improve my baking skills, I recently ordered and received a new silicone-wrapped rolling pin and pastry mat from The Baker's Catalogue. I have not yet used the pastry mat, so this review will be limited to just the rolling pin.

My old wooden rolling pin works just fine, but it's a French pin, which means that the ends are tapered and, consequently, rolling uniform crusts, cookies and other goods is much more challenging and time consuming. I decided to try the silicone rolling pin rather than another wooden one because silicone has such a good reputation for being non-stick. At the time, both were on sale (unlike now), so the purchase was a bargain as well.

First things first, it's a long pin at 20 in. And, it's heavy. Heavier than I expected, but it made rolling much less work for me. I let the pin do the work, and work it did.

I used it on this recipe to roll out the graham crackers.

Now for the bad news. My dough stuck to the pin. Yes, the pin was sufficiently floured, as was rolling surface and dough. But, it still stuck. Not badly. Not "rip-the-dough-to-shreds" badly at all. But, it stuck nonetheless. On the other hand, it stuck less than my wooden one would have under the same circumstances.

So, how would I rate this device? On a scale of 1-10, probably an 8 because it rolled very well and felt great while I used it, but the silicone should have prevented the dough sticking. Would I buy another one? Probably not. I'd aim for a wooden one with the same dimensions and heft instead.

Sunday, April 22, 2007

Please Visit My New Blog

I hope you'll enjoy my new blog, Altered Plates. Its focus is actually the same as the cookbook I'm writing -- altering recipes to suit my various dietary restrictions.

My dear friend Richard Factor came up with the great name for the book, which I decided to use as the title for the blog since it fits so well. My wonderful husband John helped me alter the site so that it suits my blogging needs.

FYI, Altered Plates will not replace this blog, Here and There. It does however, refocus this blog to simple cooking pursuits, news on Deb's Delectables, gardening and travel. Since Spring is upon us, you can definitely expect much more flower/gardening photos. Altered Plates will be limited to my cooking experiments that involve significantly altering original recipes. All original recipes will be cited and linked if possible.

Please pay Altered Plates a visit and let me know what you think. I'll be updating it at least once a week, unless I'm out of town.

Friday, April 20, 2007

Big, Biga, Biga-ist

In my quest to improve my bread baking (and save money on rolls for John's lunches), I ordered a great sandwich roll pan from King Arthur flour.

I also decided to noodle around with the recipe included with the pan for Stuffed Sandwich Rolls. I decided to make it whole grain by substituting one cup of all-purpose flour for white whole wheat flour. The resulting rolls were nice and fluffy, but not as tasty as my first foray into whole grain baking.

It also was my very first time making a biga. Can anyone please tell me the accurate pronunciation of biga? I said it two different ways on my little video (below), but I'd like to know the correct way. Appreciate your help.

Sub Sandwich Rolls

Yields 5 large sandwich rolls.

Ingredients
:

For the biga:

1 cup all-purpose flour
1 cup white whole wheat flour
1 cup water
1/4 teaspoon instant yeast

Combine, cover and let sit for at least 4 hours.


For the dough:

The biga
2 cups all-purpose flour
2 cups white whole wheat flour
1 cup water
1 tablespoon agave nectar
1 tablespoon salt
1 tablespoons unsalted butter
2 teaspoons instant yeast
2 tablespoons orange juice

Directions:

1. Place the dough ingredients in your mixer and stir everything together to form a shaggy mass.

2. Let the dough rest, covered, in the bowl for 20 minutes.
3. Knead the dough for 8 to 10 minutes until smooth, soft and supple.
4. Place the dough in a lightly greased bowl, cover and allow to rise until doubled in bulk (about an hour).
5. Gently deflate the dough and divide it into 5 pieces. Shape each piece into a rough, slightly flattened oval, cover and let rest for 15 minutes.
6. Working with one piece at a time, fold the dough in half lengthwise and seal the edges with the heel of your hand. Flatten it slightly and fold and seal again.
7. Roll the dough into 10-in. long logs and place in the lightly greased sandwich roll pan. Cover and allow to rise until doubled in size (about an hour).


8. Spritz the rolls lightly with water and bake in a preheated oven for 12 to 15 minutes, until golden brown and the internal temperature registers at least 190 degrees F on an instant-read thermometer.

9. Cool completely on a rack before slicing and filling.

Thursday, April 19, 2007

Happy Birthday to My Blog!

Congratulations to me! This blog of mine is two years old today. This is my 735th post!

Along the way, you have traveled with me to Utah, Maine, New York and Florida. I've made hundreds of chocolates, as well as a variety of other foods. You've also joined me on several garden explorations and watched the progression of my garden here in Somerset, New Jersey.

Thank you to all my readers who have visited over the past two years. I appreciate your support.

To thank you even more, I'm developing a brand new blog just focused on my cookbook writing efforts. I'll premiere it here soon, so keep checking back!

For now, though, here's my Matzo Brei recipe to help those with leftover mazto from Passover.

Matzo Brei

Ingredients:

2 slices of plain matzo
2 slices of egg matzo
4 eggs
2 teaspoons of milk
1 tablespoon of oil
Salt and pepper to taste

Directions:

1. Break the matzo into 2-in. pieces pieces and rinse under warm water for 2 minutes.
2. Drain and place the matzo into a medium bowl.
3. Beat the eggs and milk together, and pour on top of the matzo pieces.

4. Heat the oil in a 9-in. skillet on medium high.
5. Mix the eggs and the mazto together until the matzo is well coated with the egg mixture.
6. Season with the salt and pepper.

7. Add the mixture to the heated pan and spread it out until it's a large matzo pancake.
8. Cook until medium golden brown on both sides.
9. Enjoy!

I like my matzo brei with fake bacon or soy sausage. I wish I could say this is easy to veganize, but you really need the eggs to make it work.

Matzo brei has to be near the top of my list of comfort foods. Although egg matzo is not made all year round, you can still make it with any variety of mazto you can find. Some folks like it served with ketchup (count me among them), while others smear it with jam. Either way, it's yummy stuff!

Tuesday, April 17, 2007

Big Flood of 2007


This is right down the street from our house by another youtube user. About an hour ago, more than 24 hours after that video was taken, Easton Avenue was finally opened. This part of Easton Avenue in Somerset is banked by the Raritan Canal, an overflow of the Raritan River that runs parallel to it and has great bike paths (now under water).

The mighty Raritan topped 10 feet over flood stage, and is still around 4 feet above flood stage. Those poor folks in Bound Brook and the surrounding towns are in really bad shape today.

"Can't get there from here..."

Yesterday, and until about an hour ago, there was no way for us to really cross the Raritan, except via Rt. 27 -- and even then, we would have to wind our way through Highland Park because River Road was completely flooded.

All the exit ramps to/from 287 within a 20 minute drive of our house were closed.

So, all we could do was stay inside, especially given the State of Emergency announced by acting Gov. Codey (poor guy, he's had quite a time of it lately, between Gov. Corzine's terrible accident and this flood!).

Then, the horrendous tragedy of yesterday's murders at Virginia Tech occurred. So, between watching the flood videos and the terrible news on my computer, I decided that I had to go downstairs and keep my hands busy.

I made Graham Crackers from the King Arthur Flour Cookie Companion. The recipe will follow in a separate posting.

Monday, April 16, 2007

Doomed Whole Wheat Baguettes

Did you ever debate with yourself if you should continue on with a recipe, despite the obvious red flags popping up at every turn?

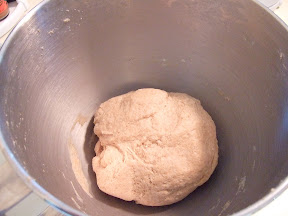
For the sake of my own education, I soldiered on with this recipe, taking short movies of the continuing downward spiral. It was a surprise, too, since the recipe originates in the brand new Bob's Red Mill Baking Book Mom and Dave sent me for my birthday. Oh well.

Here's the recipe, along with the accompanying short movies.

Whole Wheat Baguettes (The original recipe is for Rosemary Baguettes, but I opted out since John was my target audience, and he's not a fan of rosemary-scented anything.)

Ingredients:

1 tablespoon agave nectar
1 1/4 cups warm water
2 1/4 teaspoons active dry yeast
2 teaspoons salt
1 1/2 cups hard white whole wheat flour
2 cups whole wheat flour

Directions:

1. In your mixer bowl, dissolve the agave nectar into the water, then sprinkle the yeast on top and stir. Allow to stand until foamy, about five minutes. (The yeast proofed just fine for me, so it wasn't that.)
2. Add the salt and the hard white flour, stirring well.
3. Stir in 1 1/2 cups of the whole wheat flour to form a stiff dough. (This dough was so stiff, I had to add some orange juice.)
4. Turn the dough out onto a lightly floured surface and knead until smooth and elastic, about 10 minutes. (By some miracle, I got to this point, but it took longer than 10 minutes, and many additions of liquid.)

5. Lightly oil a large bowl, place the dough inside and cover with a clean dish towel. Let the dough rise until doubled in size, approx. 1 hour. (It took closer to 2 hours, despite putting the dough on top of the running dryer.)
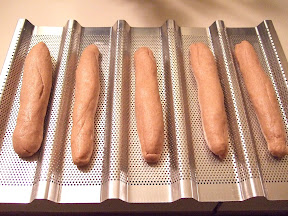
6. Line a 17 x 14 in. baking sheet with parchment paper or lightly oil and dust with cornmeal. (I used my new sandwich rolls pan from King Arthur Flour, coated lightly with vegetable oil.)
7. Punch the dough down, divide it in half and return it to the floured surface.
8. Shape each half into a long loaf. Place each loaf down on your prepared pan.

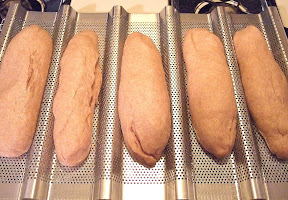
9. Allow loaves to double in size again, another 45 minutes. (Allow much longer than that. I actually let them rise 3 times.)
10. Preheat the oven to 400 degrees F.

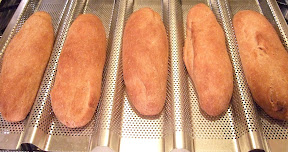
11. Using a sharp knife, cut a slash across the top of each loaf, brush with water, and bake for 15-20 minutes, until brown and crisp. (It took closer to 30 minutes for my loaves to finish.)


12. Cool on a wire rack.

It was truly an exercise in patience. The bread was awful.
However, I will give Bob's Red Mill a second chance with another recipe since I really like their products.

Saturday, April 14, 2007

Garden Update


Back in the later days of March, John and I escaped to Utah with the intent of doing some skiing along with visiting his family. However, there had been no new snow, and none to come until the day of our departure, so I suggested that he fish a bit more with his dad. In the meantime, I looked for other non-fishing fun for our days together.

One place that had long been on my list of Salt Lake City wonders to visit was the Red Butte Gardens and Arboretum. Red Butte is located in the foothills of the Wasatch Mountain range that rings the valley of Salt Lake City. It's also part of the University of Utah's scenic campus.


Although spring had not quite sprung yet on the East Coast, it was encouraging to see sunny daffodils decorating the front and back of Red Butte Gardens. From the rear of the Visitors' Center, the gardens open to a large field rimmed with seasonal plants, all carefully tagged and annotated for visitors. Beyond the field are miles and miles of trails, along with a very active children's area.


All this with a fantastic view (on a not-so-polluted day) of the opposing mountains of the valley.

John and I decided to hike along the organized trails first to see what the arboretum had to hold before venturing onto the more vigorous trails around the mountain.


The most fascinating flowers were these unusual hellebores in gorgeous blues and deep reds. I wanted to think that they were mislabeled since they didn't resemble any hellebores I'd ever seen, neither in leaf nor flower. However, that's why it's an arboretum, and I'm a lowly tourist -- to learn something new!


We also saw this different type of magnolia. It's a Yulan magnolia from central China. The blossoms look like waxy white tulips growing from the branches.


The arboretum gardens had plenty of whimsy. They were decorated with life-sized copper moose, deer and assorted fish along the paths. The day we visited, there were plenty of children playing on the statues and having their photos taken while astride the moose. Like the moose John and his dad have seen while fishing, they tend to like quiet, solitary time. Consequently, I waited until the throngs had moved on before taking this moose's photo.


Finally, as I anxiously await the arrival of my Montclair irises, I'll remember with fondness the miniature irises I witnessed in March at the Red Butte Gardens and Arboretum.

Wednesday, April 11, 2007

Birthday Baking

Mom and Dave very kindly bought me a copy of the King Arthur Whole Grain Baking cookbook and the Bob's Red Mill Baking Book for my birthday back in March. Both were very happily received because I've been searching for whole grain recipes to replace the white bread in our lives.

In honor of my high opinion of King Arthur Flour, I gave the Wheat Rolls recipe a go first.

Here it is, adapted from the original recipe, with accompanying photos:


Wheat Rolls

Ingredients:

1 cup lukewarm water
1/4 cup orange juice
4 tablespoons butter
3 tablespoons agave nectar
2 cups whole wheat flour
1 cup unbleached all-purpose flour
1 1/4 teaspoons salt
Heaping 1/2 cup dried potato flakes
1/4 cup nonfat dry milk (I crushed the dried milk I had with a rolling pin until it had the consistency of flour)
2 1/4 teaspoons instant yeast

Directions:

1. Combine all the ingredients, and mix and knead them (I used the mixer) until you have a medium-soft, smooth dough.

2. Cover and allow the dough to rise until quite puffy, though probably not doubled in bulk, 1-2 hours. (Because my house was so cold in March, when I made this recipe, I took advantage of the fact that John was doing the laundry and placed the bowl with the dough on the dryer to help it along in its rising.)
3. Gently (and I do mean gently) deflate the dough and transfer it to a lightly greased surface. Divide it into the number of rolls you wish to make (the original recipe makes 16, but I made 12 long, thick sandwich rolls).
4. Shape each piece the way you wish (I just rolled them with my hands into long tube-like structures), and place each on your lightly greased pan.

5. Lightly oil your rolls and cover them with plastic wrap.
6. Allow the rolls to rise for 1-2 hours. They should be really puffy by then.

7. Preheat the oven to 350 degrees F.
8. Uncover the rolls and bake them until they are deep golden brown on the top, but lighter on the sides (23-25 minutes).

9. Remove them from the oven and transfer them to a cooling rack.
10. Brush tops with melted butter for a soft, satiny crust.

Enjoy!

These rolls came out very well. I used them for sandwiches, as did John, although he said he'd prefer smaller ones for dinner rolls (as they were originally intended). They freeze very well when double bagged in ziplock freezer bags.

Tuesday, April 03, 2007

Two Passover Desserts

Happy Passover!

These two recipes will no doubt wind up in my cookbook since they're
  1. Very much altered to suit sugar-sensitive folks.
  2. Yummy like that!
The first recipe has been adapted from the April issue of Gourmet magazine.

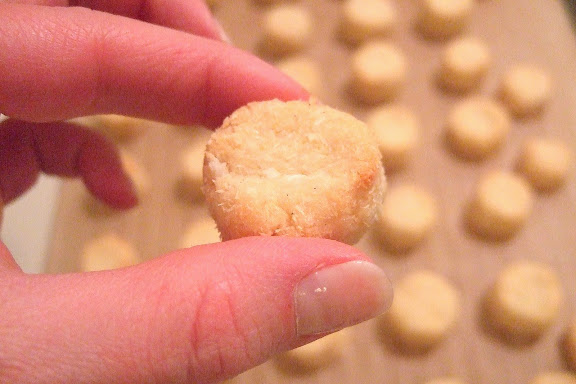
Lemon Macaroons

Ingredients:

4 egg whites
3/4 cup agave nectar
1/4 fresh Mexican vanilla bean scraped for the tiny seeds (or one teaspoon vanilla paste)
zest of one lemon
3 cups reduced fat unsweetened organic finely shredded coconut

Directions:
  1. Preheat oven to 325 degrees F and line a cookie sheet with parchment paper.
  2. Mix together the first four ingredients until very well blended.
  3. Add coconut in stages and mix after each addition.
  4. Use fingers to do final mixing since the dough will be pretty thick.
  5. Use your fingers to form 1 1/2 in. diameter disks about 3/4 in. thick, and place these on the pan about 1 inch apart.
  6. Bake 25 minutes, or until golden brown, turning the pan at 15 minutes.
Makes 40 macaroons.

This recipe is a re-do of the recipe on the can of Yehuda Matzos' Cake Meal.

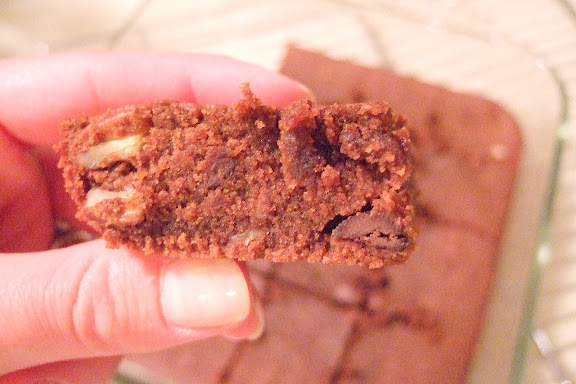
Passover Carob Pecan Brownies

Ingredients:

5 eggs
2 cups agave nectar
1 teaspoon vanilla paste
3/4 cup oil
1 cup sifted carob powder
1 1/4 cup Yehuda Cake Meal
1 1/4 cup pecans
1 cup unsweetened carob chips

Directions:
  1. Preheat oven to 325 degrees F and grease two 9-in. square pans or one 9 x 13 in. pan.
  2. With mixer, beat eggs, agave nectar and vanilla paste until well blended.
  3. Mix in oil, carob powder and cake meal until well blended.
  4. Stir in pecans and carob chips until just mixed.
  5. Pour batter into prepared pans and bake for 30 minutes.
Reviews: The macaroons are light and refreshing -- just perfect after the heavy Passover meal. The brownies are sweet, and misleading. I worried that they'd taste mazto-ish, but they didn't at all. They're light and satisfying. The chips are especially nice.

Friday, March 30, 2007

A Bit Off Topic -- Feminism

Recently, the lovely ladies at Lunapads opened their blog to guest bloggers on the topic of "What Feminism Means to Me." Being an active blogger, feminist and Lunapads user, I leapt at the opportunity. They posted my entry and kindly sent me a set of Lunapads as a reward.

If you find the story slightly familiar, it's only because relates to number 1 of my recent Five Things You Don't Know About Me entry.

Update on Deb's Delectables: We're still hammering out the details on the redesign, so it may be a while before that happens, but I am taking orders via email.

I will be back again soon with a product review, garden update, bread baking adventures and a triplog from our recent visit to John's parents' house in Utah. Not necessarily in that order.

Tuesday, March 20, 2007

A Fun Custom Chocolate Project for Deb's Delectables

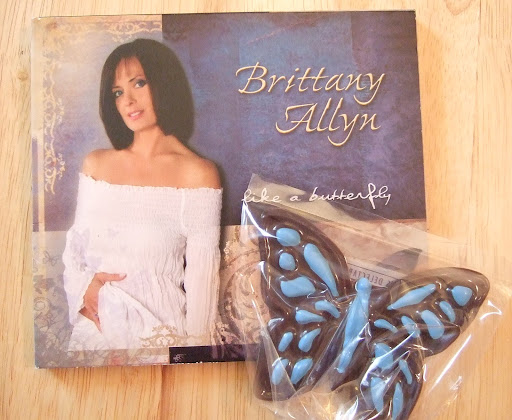
Recently, I had the pleasure of gaining a new client as well as a pretty cool custom chocolate project. Brittany Allyn, currently on tour with George Jones, had been watching the Deb's Delectables site for signs of life while we were re-doing the kitchen and working on the site's redesign. She sent me a very nice email asking if I would consider making my special butterflies to help promote her new CD. (If you look in the upper right corner of this blog, you'll see one of the butterflies.)

I responded that I'd be happy to take on the project. It's been a while since I've had some fun custom work, and I really enjoy creating and mixing colors.

Brittany sent me a copy of her CD (you should buy it, the music is lovely!) so I could match the color of the butterflies "stained glass" parts to the cover.

Matching the color was quite a challenge for a number of reasons. First, there are many shades of blue on the cover. To account for the range of shades and hues, I matched many of them in white chocolate and made demos against the dark chocolate.

One of the biggest challenges was being able to achieve a true blue, not a blue-green. The main issue there is that most of the really nice food colors are made with water, which you cannot use with chocolate. Chocolate needs an oil-based or powder color. Since I didn't have a lot of time on my hands (more on that below), I drove to Candyland Crafts, to find a powder or a close blue color.

I bought two kinds. One turned out to be more of a green-blue, albeit marked "Blue." The other was a bright blue powder that did the trick when I mixed it with a light violet colored white chocolate I had colored earlier.

Another challenge I encountered while matching the colors was the issue of brightness against the dark chocolate. I really wanted these butterflies to POP! However, all the colors that were closest to the hues on her color really didn't stand out against the dark chocolate. I chose a very close color to the butterfly on Brittany's cover, then I lightened it a bit to stand out against the chocolate. That seemed to work the best.

Then, I made a short movie describing a few choices and sent it to Brittany for her thoughts. She got a big kick out of the use of a video to communicate with customers, and shared the same opinion I had on the brightness factor.

When I'd gotten the go-ahead, I made a large batch of the winning color, so I'd have extra in case of broken butterflies and/or future orders. Then, I carefully painted the interior depressions of the butterfly molds, set the blue, then filled each mold with the dark chocolate. Half of the chocolates were on lollipop sticks, while the others were not.

These butterflies were super-fragile, and some broke during the making (one broke during delivery, but I included extras just in case -- I've been through this before). You can watch a short movie I made about it here.

Earlier that week, my father called to say that my elderly and quite ill grandfather was fading fast, so I knew I was under the gun to get the chocolates done and out the door. The day after I'd finished the chocolates and shipped them to Brittany, my birthday -- March 15, my grandfather passed away. As John and I flew to Florida for the funeral, I prayed that the fragile butterflies would arrive safe and sound in Nashville for Brittany.

When I checked my email this morning (we arrived home last night), she said only one broke, but she happily ate it. "They taste as wonderful as they look," she said. It was nice to hear it. Most of the time, I get, "They're too pretty to eat!"

I hope to make many more butterflies for Brittany, and I hope her album flies to the top of the charts.

If you'd like to see my Picasa Web Album of the project, just click here.

Tuesday, March 13, 2007

Dim Sum with The Girl Who Ate Everything

During the Chinese New Year celebration, I had a delightful lunch with Robyn at Dim Sum Dynasty in beautiful, downtown, scenic Ridgewood, New Jersey. It was a blustery, cold winter day, with snow still underfoot, but the sun shining brightly.

It was my first time enjoying dim sum, so I was very happy to have such an experienced guide. If you're not familiar with dim sum, here's how it works: the waitstaff rolls carts filled with a variety of fried, steamed, baked, and otherwise cooked items on small plates of one to three pieces. The staff stop the carts (one at a time) in front of your table, telling you what they have, until you either give in and take some or say you'll pass. Until the next cart comes and you do the same.

I wasn't sure what I'd be eating after this stop, or if it was the only stop, so I just chose a few crunchy, fried bits. This is a deep-fried crab and shrimp puff that was one of the best things I've ever tasted. It came on a dish of three, which I shared with Robyn (who was smart enough to get a steamed shrimp and spinach dumpling to offset all the fried goodies.

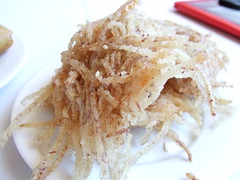
The other outstanding item was this shredded taro and shrimp snack. Like the puff, it was deep-fried and crunchy, with a sweet, fresh shrimp filling. After eating these, I vowed to visit that place with Robyn again.

We also had a few unremarkable spring rolls and Robyn's steamed dumplings.

While everything tasted fantastic, unfortunately, I was terribly sick with heartburn all night. It happens to me when I eat fried food not made at home. Maybe it's the choice of oil? I'm not sure, but John made me promise to lay off the fried food since it made me feel so awful. Too bad, it tasted fantastic.

Oh well. Robyn, next time, I'm sticking to the steamed bits of Chinese loveliness.

By the way, if you haven't had the opportunity to meet and dine with Robyn, she's a wonderful companion with a sunny disposition. Her blog is a riot with the most gorgeous photos, too!

Thursday, March 08, 2007

Five Things You Don't Know About Me

Well, in some cases (family and very close friends), that may not be true, but for you fellow bloggers and other happy visitors, here's my entry to the meme that's been making the rounds.
  1. I made history (with a number of other women) by participating in the first women's sabre fencing competition at the U.S. nationals. (Prior to that, my 15 minutes of fame came when I battled the state of NJ in the press for my Title IX right to fence sabre on my high school varisty sabre team. Title IX applies here because foil is not equivalent to sabre, even if there is a girl's foil team. It's simply not the same sport, albeit similar in nature. At that time, as far as I know, I was the first girl to fence sabre on a high school varisty team.)
  2. I love maps and the ability to become "un-lost," if I can find a map of the general area. Years ago, when the New York Public Library announced an exhibit on maps, I looked forward to it for weeks. I'm also very fond of my GPS.
  3. I'm great at keeping secrets, most likely because I have a terrible memory. If I don't write something down, it's gone. Just call me "Ten Second Deb."
  4. When I was little, I wanted to be either an astronaut or a lawyer. I'm neither, although I like a good debate and tend to challenge quite a few things people say if I know them to be untrue.
  5. I turn 38 a week from today. It's not bad, really. The best stuff has happened in the past few years. I can only imagine what will come next.
Feel free to do your own five things.

Wednesday, March 07, 2007

Great Find for Eco-Friendly Shopping

Last night, I popped into a Trader Joe's I'd never visited before, in the Pompton Lakes/Wayne area of Northern New Jersey. I was pleasantly surprised that I could purchase an insulated shopping bag for carrying freezer and refrigerated items instead of just the canvas bag I'd been carrying. Additionally, the bag is sizable enough to carry more than a typical paper bag of groceries, and you can hook it over your shoulder!

Mind you, I'd been to the Trader Joe's in Florham Park, New Jersey earlier in the day, and they did not yet have the insulated bags, just the laminated shopping bags -- nice themselves, albeit not insulated.

The insulated bags are $1.99 a piece and the laminated ones are $.99 each. What a deal for not using more plastic/paper bags every time you shop!

Monday, March 05, 2007

Two of Dorie's Waffles Altered to Suit Sugar Sensitivities

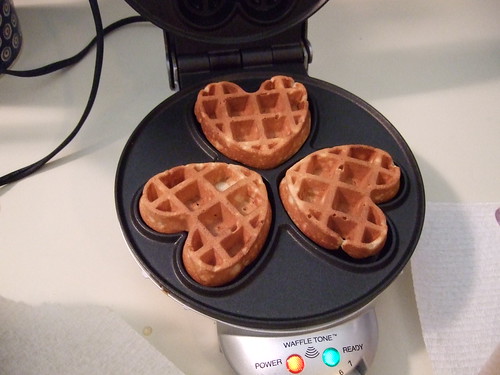
Nearly four years ago, when John and I were first dating, we went shopping with a thick stack of gift certificates to Williams-Sonoma from my first engagement. One of the items I purchased was this great heart-shapes waffle iron from VillaWare. It came with a thin booklet with some pretty standard recipes, so I added Dorie Greenspan's Waffles From Morning to Midnight book to our basket.

Over the years, two of the recipes have become our favorites: Double Vanilla Waffles and Gingerbread Ice Cream Hearts. I made both these recipes for the great breakfast extravaganza a few weeks ago. I think the vanilla ones are my favorites, but either way, they always come out great!

Luckily, waffle recipes often include a significant liquid component, so it makes it easy to swap out sugar for agave nectar, which is just what I did. If you wish to veganize these, just use margarine and soy or rice milk, along with egg replacers. It does work, albeit, not as well.

Two caveats: these recipes are not quick. If you're giving a breakfast extravaganza, like I did, start early! Also, remember that agave nectar batters brown faster, so you might want to adjust the heat of your waffle iron after the first batch.

Here are my versions of the two recipes:

Double Vanilla Waffles (makes approximately 15 small heart-shaped waffles)

Ingredients:

1 1/4 cups milk
2 tablespoons vanilla paste (divided)
5 tablespoons butter (I used salted)
1 3/4 cups all-purpose flour
2 teaspoons double-acting baking powder
1/3 cup agave nectar
2 large eggs

Directions:

1. In a medium saucepan on medium-high heat, whisk 1 tablespoon of the vanilla paste into the milk. Heat the mixture until the milk boils, then cut the heat and let it sit for at least an hour.
2. In a small skillet, melt the butter until it's golden brown, swirling often so that it doesn't burn. Set the butter aside to cool.
3. Turn on your waffle iron and preheat your oven to 200 degrees F because you will want to keep the done waffles warm while you're making the others.
4. In a large bowl, whisk together the flour and baking powder.
5. Whisk the butter, eggs, agave nectar and remaining vanilla into the milk until well combined.
6. Pour the liquid ingredients over the dry ingredients and whisk until just combined.
7. Pour the whole mixture into a large liquid measuring cup (a four-cup measuring cup works well), and pour from the cup into your waffle iron's hot, oiled grids until the batter just covers the grids. You may need a silicone spatula or a wooden spoon to gently spread the batter over the grids.
8. Close the lid and bake until crisp.
9. Place the cooked waffles in a single layer on a baking sheet in your heated oven until you're ready to serve.

These are great with ice cream, Rice Dream or any other frozen dessert.

Gingerbread Ice-Cream Hearts (makes approximately 20 heart-shaped sandwiches)

Ingredients:

4 tablespoons butter (I used salted)
2 cups all-purpose flour
1 tablespoon double-acting baking powder
3/4 teaspoon baking soda
1 tablespoon ground ginger
3/4 teaspoon ground cinnamon
1/2 dried mustard
1/4 teaspoon ground cloves
1/4 teaspoon ground nutmeg (or freshly grated)
3/4 cup agave nectar
1 1/2 cups milk
2 large eggs (separate whites from yolks)
1 quart softened ice cream (or your favorite frozen dessert) to fill the sandwiches

Directions:

1. Melt the butter and set it aside.
2. Whisk together the flour, baking powder, baking soda, salt and spices to combine.
3. In another bowl, whisk together the milk, agave nectar and egg yolks.
4. In your mixer bowl, whip the egg whites until they hold firm peaks.
5. Blend the milk mixture into the dry ingredients until they are combined.
6. Stir in the melted butter to combine.
7. Gently fold in the egg whites.
8. Oil your pre-heated waffle iron.
9. Pour the whole mixture into a large liquid measuring cup (a four-cup measuring cup works well), and pour from the cup into your waffle iron's hot, oiled grids until the batter just covers the grids. You may need a silicone spatula or a wooden spoon to gently spread the batter over the grids.
10. Close the lid and bake until crisp.
11. Cool the cooked waffles in a single layer on a baking sheet until room temperature.
12. Spread half of them evenly with the ice cream, between 1/4 in and 1/2 in thick, depending on how indulgent you feel.
13. Top them with the remaining waffles.
14. Feel free to decorate the sides however you wish -- candied ginger (although they contain lots of sugar), carob chips, etc.
15. Transfer the sandwiches to a waxed paper-lined baking sheet and freeze until firm. Use small zip-lock bags to store the sandwiches when they are firm.


Wednesday, February 28, 2007

Cinnamon Rolls

A few weeks ago, I hosted a breakfast extravaganza for Mom, Dave, Lenny, Jerome, John and myself. I served two different kinds of waffles, vegetarian sausage links and patties, Mom's fruit salad, and the cinnamon buns described in this entry.

These cinnamon rolls are based on the Fruit Sweet and Sugar-Free cookbook's "The Best Egg Bread" and "Our Famous Cinnamon Rolls" recipes. I've made a few little alterations. I've included both still photos and little movies in the description. Please let me know what you think!

Do ahead:
The day before, make the cinnamon roll filling below.

Cinnamon Roll Filling:
1 cup walnuts
3/4 cup raisins
3/4 cup agave nectar
1/4 cup butter, softened
2 tablespoons cinnamon
3 tablespoons flour

1. Toast the walnuts in a 350 degree F oven for 7 to 10 minutes. Allow the nuts to cool, then chop them coarsely either by hand or via a food processor.
2. Boil one cup of water and add the raisins. Cut off the heat when the water returns to a boil again, and let the raisins plump for 10 minutes. Drain the raisins and store them in the fridge until needed.
3. Cream the agave nectar and the butter until well mixed. Stir in the cinnamon and flour, then the walnuts. Refrigerate this mixture until you're ready to use it.

Make the Egg Bread:
1 1/2 cups milk
3 tablespoons agave nectar
6 tablespoons softened butter
3 eggs beaten
2 teaspoons dry baker's yeast
2 teaspoons salt
5 - 5 1/4 cups unbleached white flour

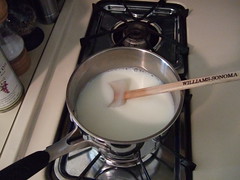
1. Scald the milk with the agave necar over medium heat.
2. Combine the scalded mixture with the butter in the bowl of an electric mixer.

3. After the mixture has cooled to lukewarm, add the eggs, yeast, salt and 5 cups of flour until it forms a soft dough. Knead for 5 to 10 minutes.

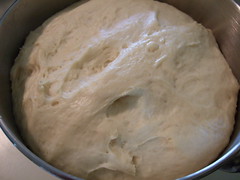
4. Place the well-kneaded dough in a lightly oiled bowl covered with plastic wrap, and let it rise in a warm place until doubled in size.

5. After the first rise (about 1-2 hours), gently deflate the dough and knead it in the bowl for about 1 minute. Then cover it again, and let it rise again until doubled.

Assemble the Cinnamon Buns:

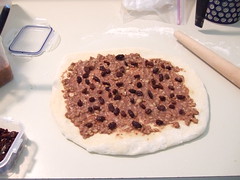
1. After the dough has risen twice, roll it into a rectangle measuring 18 inches by 20 inches. Cover the rectangle with the chilled filling, leaving 1/2 inch to 3/4 inch of space at the top of the rectangle. Sprinkle the raisins on top.

2. Beginning at the side closest to you, tightly roll the dough and mixture all the along the length of the rectangle until you've made a spiral.

3. Use a serrated edge knife to cut the roll into equally sized portions. I cut mine about an inch thick because I didn't want gargantuan rolls.

4. Place each roll 1-inch apart on a parchment paper-lined baking sheet, and cover with plastic wrap for their third rise.

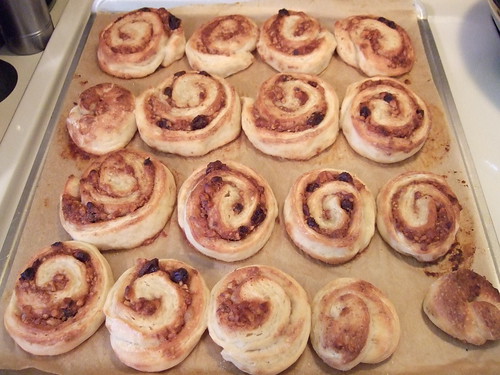
5. Preheat the oven to 325 degrees F. Bake the rolls for 25-30 minutes until golden brown and slightly crusty.

6. While the rolls are baking, prepare the glaze.


Cinnamon Roll Glaze:

1/4 cup instant nonfat dry milk (get this as powdery as possible by putting it in a ziplock bag and crushing it with a rolling pin)
2 1/2 tablespoons of unsweetened apple juice
3/4 cup agave nectar
1/4 teaspoon vanilla extract
1/8 teaspoon almond extract

1. Whip all the glaze ingredients until just foamy.
2. Generously brush the rolls with the glaze while they're still warm from the oven.
3. Chow down with friends!

Review:
I deviated a bit from the recipe because I wanted to freshly bake these the morning of the event. I had refrigerated the rolls after their third rise, and I think this affected the dough a bit. They were somewhat hard after baking, but not altogether bad at all. I had enough dough and filling leftover to make two loaves of cinnamon bread. I gave one to Mom and Dave, which they enjoyed. I also had some of the glaze leftover. This did not store well, and in fact, separated. The foamy bit on top really reminded me of marshmallow fluff. Overall, flavor was good, and the loaves fared much better than the rolls. This makes me think that it was cook's error, and that I should have sliced the rolls much thicker. A B- would be a fair grade.

Next time, the waffles, which were far superior to the cinnamon rolls. They should have been, their recipes came from the Dorie Greenspan "Waffles" book.

Sunday, February 25, 2007

My Take on Isa's Gingerbread Apple Pie


My apologies to Isa Chandra Moskowitz as I write the following words: I have de-veganized yet another of your wonderful recipes from Vegan With a Vengeance. I admit, I like butter. A lot. And, it made a great pie that John's Aunt Dot really enjoyed. Dot wasn't the only one, either.

It's such an easy pie to make. The only time-consuming part was slicing the bag of Granny Smith apples thinly because I did it by hand, not via a mandoline (a good birthday gift, hint, hint, hint) or a food processor (mine doesn't slice -- another good gift idea). I'm looking forward to making this a whole grain recipe. The crust really lends itself to tinkering in that way, especially given the liquid sweetener.

Here's my altered version of the recipe. It takes a few more liberties than usual, especially with the crust to account for the sugar/agave exchange, but it was definitely a success!

Gingerbread Apple Pie

The Crust:

1 1/2 cups all-purpose unbleached flour
1/3 cup agave nectar
1 teaspoon ground ginger
1/4 teaspoon ground allspice
1 teaspoon baking powder
1/3 cup butter -- use salted
1 tablespoon cold water, if needed

The Filling:

2 pounds Granny Smith apples, peeled, cored and thinly sliced
1/3 cup agave nectar
1 teaspoon ground cinnamon
1/4 teaspoon ground nutmeg
1/4 teaspoon ground allspice
1/2 teaspoon ground ginger
1/8 teaspoon ground cloves
1 tablespoon canola oil
2 tablespoons arrowroot

Preheat oven to 350 degrees F.

Make the crust:
Sift together the flour, spices and baking powder. Cut in the butter one tablespoon at a time. Drizzle the agave nectar over the dough, mixing until the crumbs begin to cling together. If needed, add the water. Set 1/2 cup of the dough aside. Gather the rest in a ball and knead for 5 minutes. Press into pie pan and bake for 10 minutes.

Make the filling:
While the crust bakes, mix all the ingredients for the filling together except the arrowroot. Then, add the arrowroot and mix until it is completely dissolved.

Assemble the pie:
Fill the crust with the apple mixture and crumble the remaining dough over the filling. Cover with foil and bake for 20 minutes. Remove the foil after 20 minutes and bake for 30 minutes more. The filling should be bubbling and the apples should be tender.

When I baked this pie for John's family gathering last month, I baked it for a total of 40 minutes, then popped it in his cousin Holly's oven to finish it while we were eating Steve's (of Bethlehem) pizza. Eating the warm pie was wonderful. Not a piece was left.

I'm having a bit of difficulty linking to Flickr from Blogger (what a surprise!), so if you want to see a photo of the pie, click here.

Monday, February 19, 2007

Corn Fritters

This is another slight alteration to a recipe from Vegan with a Vengeance.

Backstory: I'd made some frozen organic corn as a side with dinner. John didn't want any, so I was left with way too many servings for myself. I had been paging through all my cookbooks for recipes I'd altered when I found the "Fresh Corn Fritters" in VWAV. While I'm not a fan of tofu, I decided to keep an open mind and try the recipe. My review is at the end.

By the way, I'm trying to use more video footage in my blog. Please let me know what you think of this technique.

Here's my version:

1 12-0z package of extra-frim silken tofu
2 tablespoons of organic raw agave nectar
4 tablespoons of organic rice milk
1/2 cup of all-purpose flour (you can substitute most flours here)(fava-garbanzo might be interesting)
3 cups of cooked frozen corn kernels
1/2 teaspoon freshly ground pepper
1/2 teaspoon sea salt (I grind mine in the salt mill)
Grapeseed oil for frying

In a food processor, whip the tofu, agave nectar and rice milk until smooth.

Add half the corn and pulse until the mixture is chunky, but you can't see too many corn pieces.

Transfer to a bowl and add the rest of the ingredients except the oil.

Now, here's where I made my first mistake -- I used too much batter and didn't flatten the fritters out with the back of my spoon.

The recipe says 2-3 minutes on each side, but I wound up cooking all my batches much longer than this.

The key thing is to use much smaller amounts of batter than you think you'll need, and turn these into wee appetizers.


Tuesday, February 13, 2007

Have French Toast, Will Travel

Last Friday, I drove an hour north to the home of my friend Richard Factor and his lovely housemate, Barbara. Also visiting (and hungry) was Terry, from up the road and across the street.

I descended upon them with a bag of sliced French Bread from Callandra's, a container of my French toast dip and a small bottle of agave nectar for my own use.

Then began the discussion of The Stove. Richard's basement is home to the new stove, which is hardly new since it's been living there for quite some time. It's still there, and not located in the kitchen where it should be, because there is some disagreement between Richard and Barbara regarding the counters. As far as I can tell, the counters will have to be replaced in order for the stove to be installed. However, they also have a sizable kitchen island that matches the counters, and will also have to be updated should they replace the current counters. Have you been through this?

The advantages to replacing the old stove would be many. First, the old stove only has two working burners. Second, they're electric. Third, one of the working burners only works on high, which was very challenging for me and led to my nearly burning the French toast.


All this was discussed while I soaked the day-old bread in my special egg mixture (to be included in the future cookbook). Speaking of the cookbook, while I was shooting this little film of Barbara turning the bread, Richard figured out a name for the cookbook (which will remain a secret until published, but he will get full credit for it).

Here's Richard now making space for my book in their kitchen shelves. I will have between 1 and 1.5 inches for mine. Isn't that nice of him?

It was a gorgeous, yet chilly day. Just perfect for a warm breakfast of French toast with friends.

Thursday, February 08, 2007

What's in My Grocery Cart?

A few fellow food bloggers have been writing about what's in their "trolleys." Here in the U.S., we tend to call them grocery carts, although I like thinking about them as trolleys. Reminds me of San Francisco.

This is a big food weekend for me. Tomorrow morning, I'm going to visit Richard and his lovely housemate Barbara and cook my famous French Bread French Toast for them. That's reflected in some of the ingredients in the list below. On Sunday morning, Mom, Dave, and my friends Lenny and Jerome will come for homemade waffles and cinnamon buns (among other delights). Some of the needed ingredients also were in my grocery cart this morning.
Here's what was in my cart:

2 packages of cage-free eggs (two for $5)
Skim milk
1/2 lb of Boar's Head baby swiss cheese (for John's lunch sandwiches)
1 lb of Boar's Head Ovengold roasted turkey (again for John's sandwiches)
1 package Callandra's sandwich rolls (the BEST bakery in NJ)
2 long Callandra's French bread loaves (for tomorrow morning's festivities and one to send to John's parents in Utah, where good bread simply does not exist)
1 Calladra's panella loaf (also bound for Utah)
1 package of soy sausage patties (for the Sunday breakfast extravaganza--I haven't tried these yet, so I'll post a review afterward)
2 24-packs of Dannon half-liter water bottles (John drinks bottled water almost exclusively)
1 8-slice package of Taylor pork roll (also another item that cannot be had in Utah)
2 small bunches of bananas
1 lemon
1 10-pack of organic baby carrots (for John's lunches)
1 bag of organic spinach
2 packs of Hodgson Mill yeast (for the cinnamon buns)

The bill came to just over $60.00.

Next time, French Bread French Toast on location at Richard's house. Have a wonderful day!

Saturday, February 03, 2007

A New Meme: Your CD Collection

This meme is a bit different than your typical q & a about myself. It's more a snapshot of my CD collection. I hereby invite all bloggers and non-bloggers to participate in whatever way pleases you the most. Please supply photos to go along with each question.

1. How do you organize your CDs (e.g., in alphabetical order or by genre)?
I recently changed from genre to alpha order. As a result, you'll see in the photos in this post that it's like having a wild party. Imgaine Ella Fitzgerald sitting with The 5.6.7.8's, talking about their groovy tunes! (If you haven't heard of them, they do the Whoo Hoo song in the Vonage commercials.)

2. What is your favorite style of music?
That really depends on what I'm doing. If I'm cooking or making chocolate, it may even depend on precisely what I'm making. One of my current favorites is Juana Molina. She's an amazing musician from Argentina. You can sample some of her music at Amazon.com. My favorite song of hers is Slavese Quien Pueda. Most of the time, if I'm writing or editing, you'll find me listening to classical music. Other types, like jazz, require that I pay too much attention to the music to do much of anything else except maybe cook.

3. If you arrange your music alphabetically, what is the strangest combination of artists in your collection?
Tough to say, but probably Beck, Beethoven, Tony Bennet and Bjork might top my list. Although, ELO and En Vogue might come in a close second.

4. Along the same lines, what is the best combination of artists/styles that popped up just because you alphabetized them?
This one probably makes more sense -- Jimi Hendrix and Hawaiian Slack Key Guitar Greats. Another would be John Lee Hooker and the Indigo Girls. However, I'd pay good money to see The White Stripes play with Stevie Wonder.

If you enjoyed this little glimpse into my diverse CD collection, please 1. let me know, 2. do one of your own and link to it from the comments here. I'd love to see yours.

P.S. This came about as a result of having to pack up all my CDs in boxes when our bedroom recently was painted. They haven't been this well organized since I first bought the house almost four years ago. Mind you, this is only my collection. John's is in storage since he put his entire collection on his computer to be able to use his MP3 player. He probably has around 250 CDs as well. We'll need to build some serious shelving in our next house.

Thursday, February 01, 2007

The Great Macaroni and Cheese Debate of 2007

Seems reminiscent of the great grilled cheese debate of 2005, actually. Nonetheless, there has been some chatter amongst the bloggers regarding an article on Salon.com that has some pretty nasty things to say about Annie's Homegrown Macaroni & Cheese.

First things first, while I love a great homemade mac and cheese, baked in all its cheesy, buttery goodness, I'm also a fan of the quick and easy. Moreover, while Mom raised me on Kraft's ubiquitous blue box, I found Annie's organic and less-chemically-altered version much more palatable as an adult, especially the white Wisconsin cheddar and shells. It's REAL cheese folks! Not processed cheese food.

Additionally, I learned from an Annie's box that if I turned off the gas on the stove once a boil had been re-achieved after the pasta had been added, placed the top back on the pot and let the thing sit while I did other things, I could save on gas! I now do this whenever I cook pasta. It's a simple thing, but sometimes we just don't think that way.

Finally, the recipe the author posts is not an effective way to make macaroni and cheese. When you use grated cheese in the way she explains, you get lumpy bits of cheese everywhere.

If you have the time and want a real dose of old fashioned mac and cheese, go with Paula Deen's. It's easy to make and really cheesy. If you don't have the time and just need a quickie, use Annie's organic. It's a lot better than the author of the Salon article says, especially if you use fresh butter and less milk than recommended.

I know I said I'd write about diversity, but this came up, so that will come later.