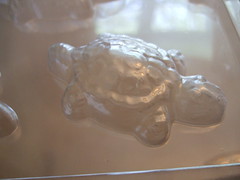
Turtle Mold
Originally uploaded by hereandthere123.
This is the turtle mold. It's about 3.5 inches long and 2.5 inches wide at the widest part. A sizeable chocolate to say the least.
This is the turtle mold. It's about 3.5 inches long and 2.5 inches wide at the widest part. A sizeable chocolate to say the least.
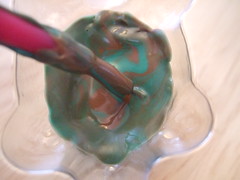
It's a time-consuming process, but well worth it when it's done. Although it looks like bright green, it's not as bright in real life. Mixing the green with the milk chocolate gives a much more realistic color to the shell.
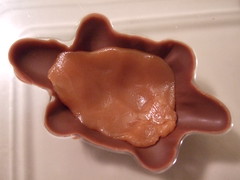
Next, I place a whole pecan half snuggly into the caramel so that it will be flat when the rest of the chocolate fills the turtle. People really love this particular caramel.
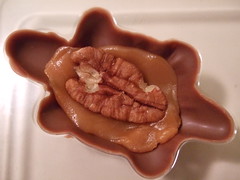
Next, I place a whole pecan half snuggly into the caramel so that it will be flat when the rest of the chocolate fills the turtle.
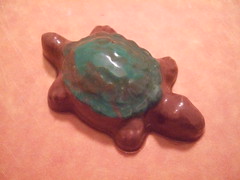
He may look small in the photo, but he is quite large for a chocolate. He measures 3.5 in. long by 2.5 in. wide. I had to buy special candy cups to put each turtle in within the gift boxes.
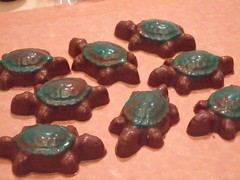
These guys took a long time to make, but were well worth the effort. Their shells looked realistic and attractive. I hope they impress their new owners!
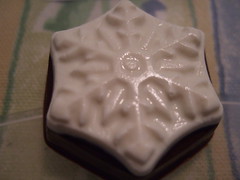
I make these hefty chocolates every year, but only during winter. The top slab of white chocolate (really white, not the ivory stuff) is flavored with peppermint oil. The dark chocolate below is filled with a peppermint buttercream filling.
Just a note on buttercream: I make a real buttercream. There's been quite a bit of discussion lately about "real" versus fake buttercream. Mine contains real butter, not shortening or anything scary. Just the good stuff.
I wrap these in a colored foil so as not to mint up the whole box. They measure 2 inches in diameter. A definite two-biter, more if you're dainty.
This is my first time using flickr as my photo posting device. Blogger's been so klugy lately that I thought it was time to try something different.
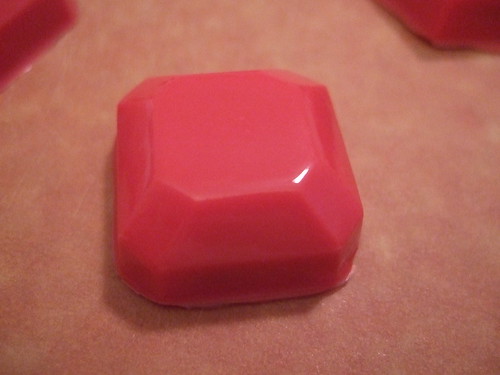
I made a boatload of these cinnamon fudge jewels last week. First, I flavor red-colored white chocolate with organic oil of cinnamon. Then, I paint the mold with the cinnamon chocolate and set it in the fridge. Next, I add the fudge filling to the mold and top it off with more cinnamon chocolate and finish it in the fridge. Here's how it looks right out of the mold.
There are three shapes, this square, a diamond, and an oblong jewel. They're all pretty spiffy and look pretty in their matching ruby red foil wrappers. More soon!


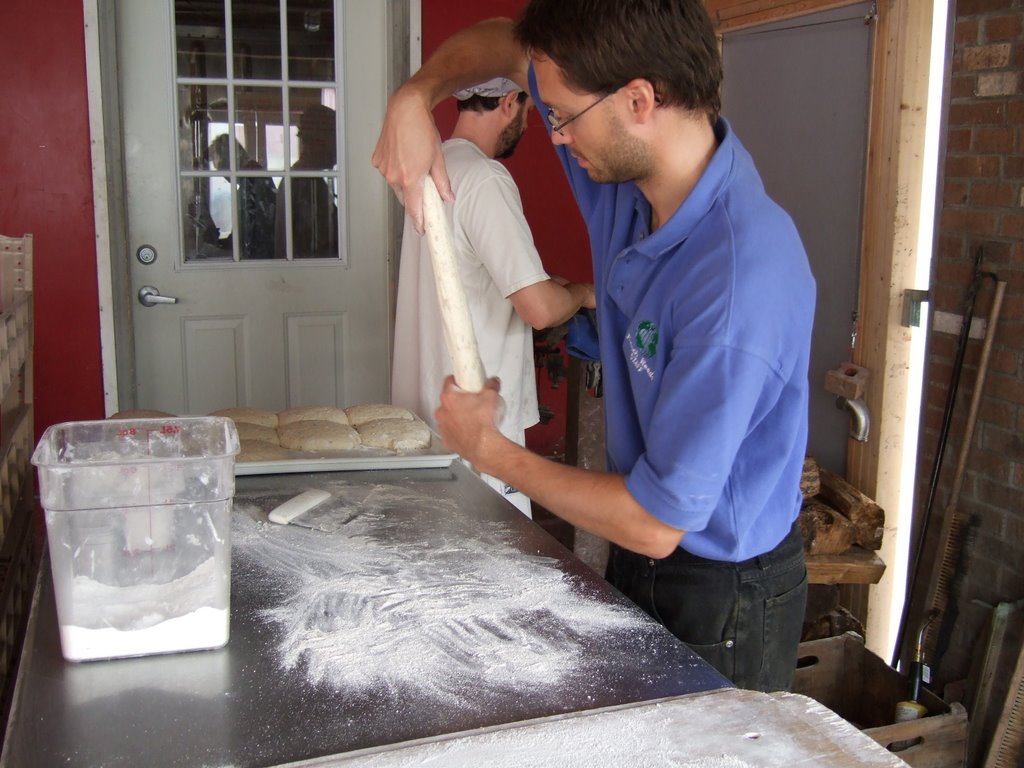
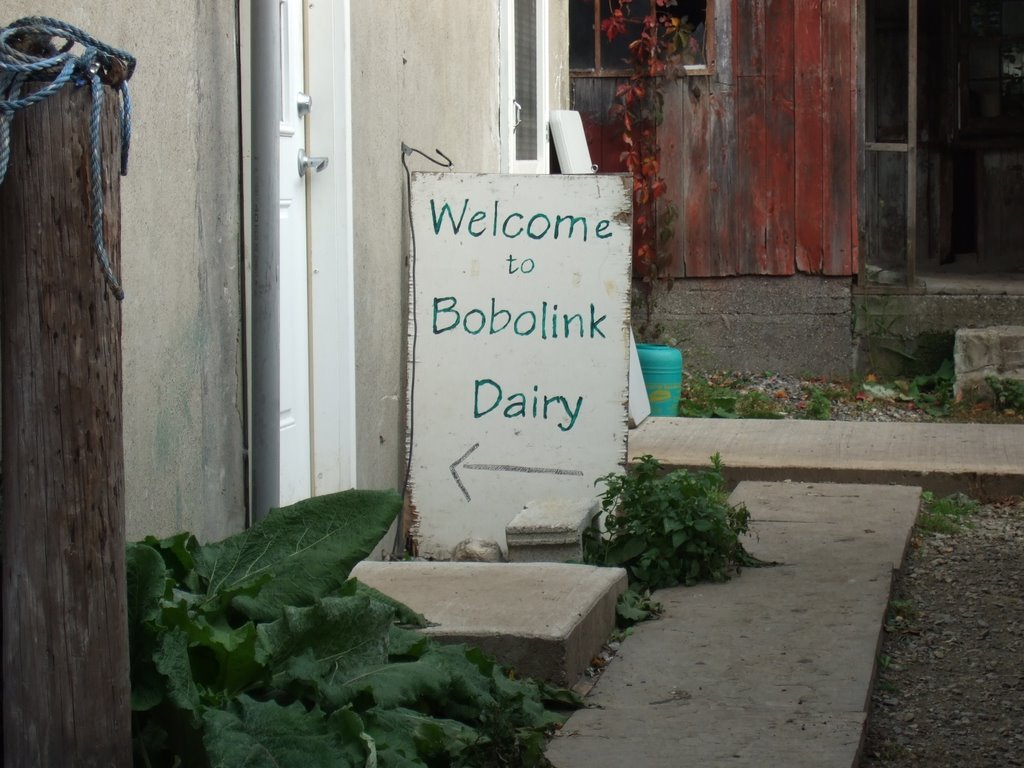 On 4 October, I had the privilege of experiencing a day-long internship at the artisnal and sustainable Bobolink Dairy and Bakeyard in Vernon, NJ. Ordinarily, the fee is $100 a day, but I bartered with Jonathan and Nina White (the owners) for two large boxes of Deb's Delectables chocolates. It was a nice trade.
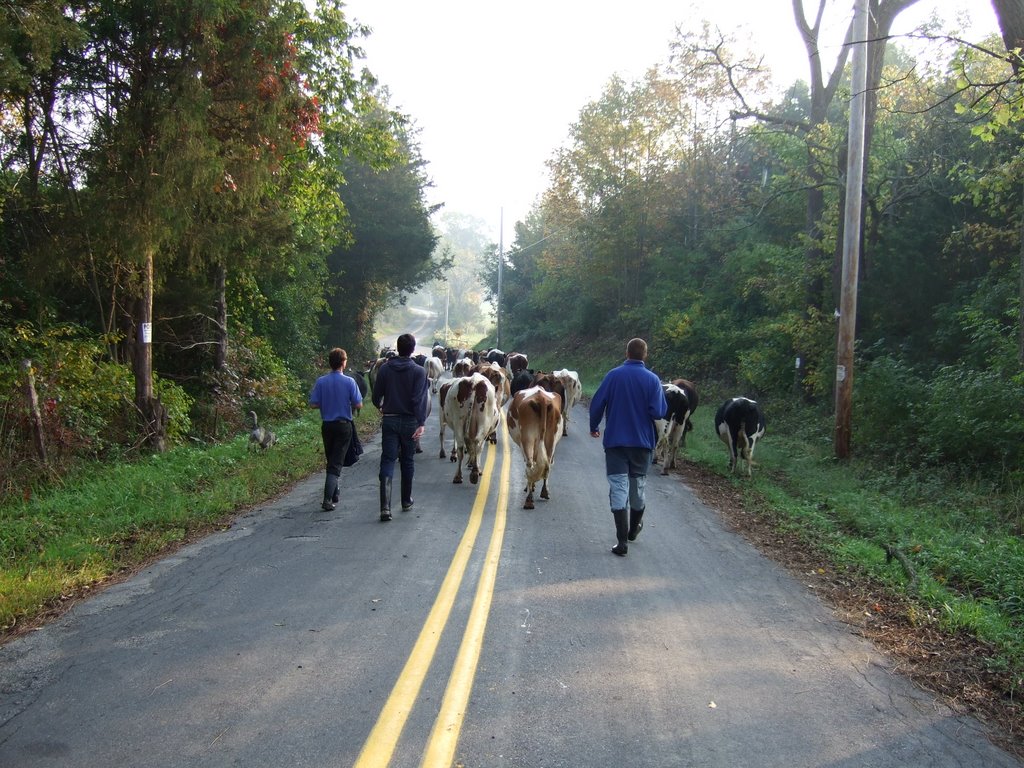 The interns were an international mix of young people who decided to do something completely different with their time than what they studied at school, with one exception, the chef Sara, who was the chief intern.
 When we moved the cows into the portion of the road near the other pasture with the calves, there was such a chorus of mooing! The cows also wanted to socialize with the calves, so it took a bit of doing to move the cows down into the main farm area and to the corral where they would be moved into the milking barn.
 Because the milking took over two hours (28 cows and only 4 milking hook-ups -- and 3 new interns), I was pretty well nauseated and had to vacate the milking area frequently. I guess if I lived on grass and clover, I'd probably be "regular" too. Just that part alone convinced me that owning a cow was not for me. I didn't stick around for the cleaning out process, choosing instead to visit the bakery (see that portion a bit later in this story). Jonathan said, "Cheesemaking is part-time. Cleaning is full-time."
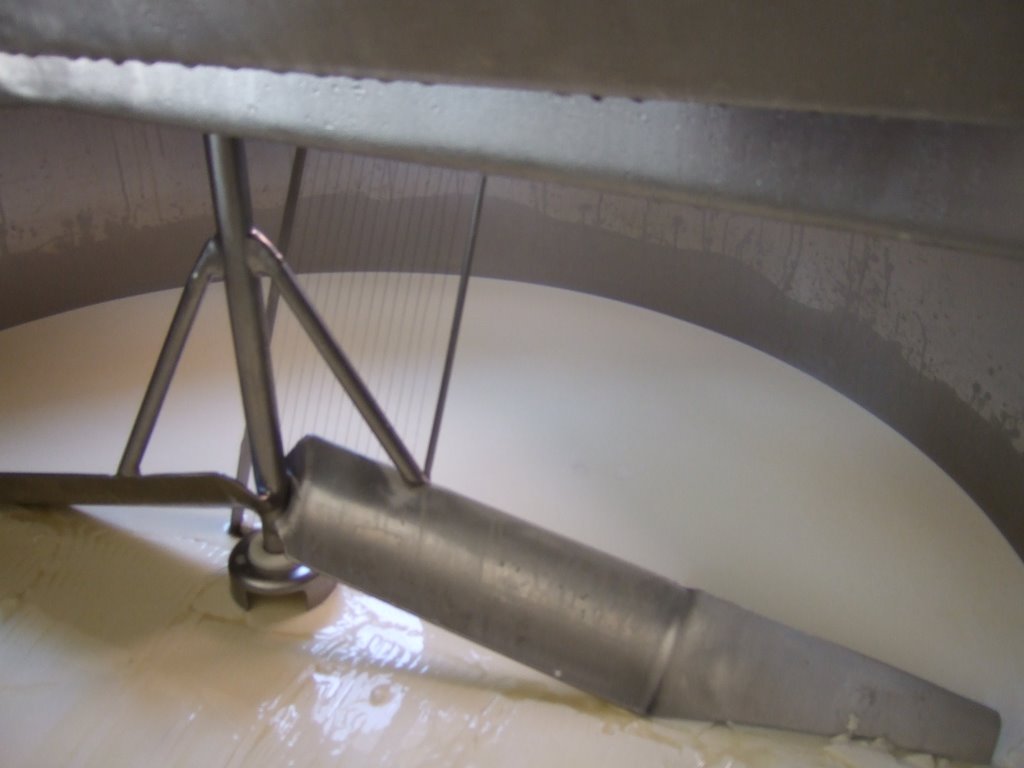
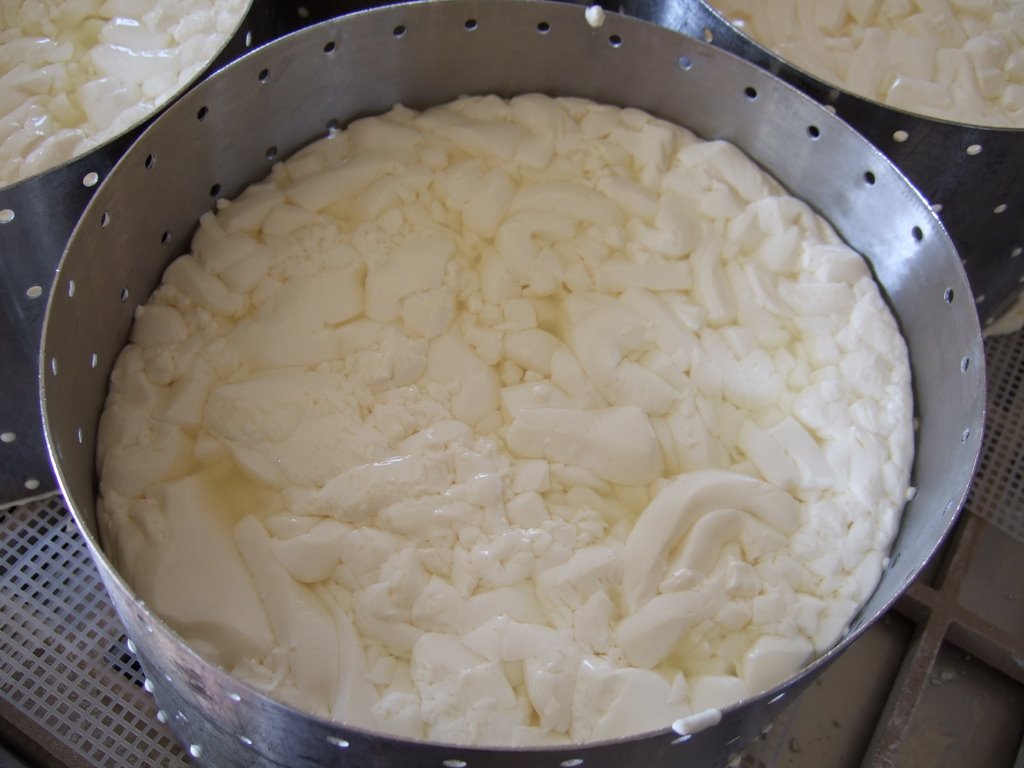 After the cheese forms, they pull out whey for the following day, and use a long cutting device (looks like it's strung with piano wire) to slice through the cheese in the vat, to make the curds. Then, there's some stirring, and finally, the curds are scooped up and placed in a mold to settle and drain. The whey drains into a large milk can, and is later fed to the Bobolink pigs. These are the happiest and healthiest looking pigs I've ever seen. Bobolink sells their pork as well as beef at their web site. They also sell their cheese, but not their bread there.