Thursday, August 30, 2007
The Winner
Remember about a month ago when I asked if anyone knew anything about Subaru Foresters and/or Jeep Patriots? Well, we made a decision and bought a 2008 Subaru Forester.
How did we decide? Well, it was really about John's final choice since it's the car he'll be driving most of the time. Here's his commentary on why:
"We basically took the entire summer to research and compare vehicles. Functionally, the Forester and the Patriot appeared very similar. They're actually nearly identical in size too although at first glance they don't appear to be."
"We test drove both vehicles 2 or 3 times. Then we arranged an extended test drive of both vehicles (I highly recommend that if your dealer gives you the option). Unknown to the dealers, I actually scheduled these test drives simultaneously. We had both the Forester and the Patriot for a full day one Saturday during which time we drove them both on our own "test track loop" and also compared all their features side-by-side in the driveway.
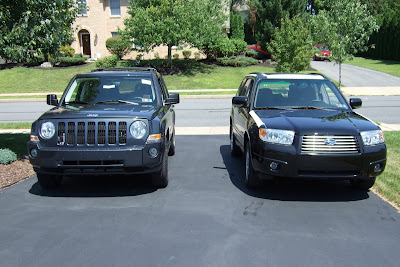
"Here are the main observations we made that we felt were significant:
* Forester handled much more comfortably -- the Jeep drives like a "Jeep."
* Forester is constructed much nicer in the interior -- the Jeep feels like a $16K vehicle.
* Forester would most likely get mid-20s mpg, but so would the Jeep.
* Patriot's front fold down seat option was very appealing
* Patriot's cargo area is wider at it's smallest width; Forester's cargo area is longer (but you can use the Patriot's fold down front seat to increase your length to up to 8').
* Forester's cargo area is taller
* Total cargo capacity in the Forester is larger in terms of cubic feet but the Patriot's cargo area seemed more flexible -- however, with the back seats up in a normal driving situation (think grocery store, etc.) the Forester's cargo area is bigger and more accommodating.
* Stock stereo systems in both were nicely featured but sound pretty awfully average
* Seats in both were comparable in comfort
* Forester has less leg room in the back seats than the Patriot, that's accomplished in the Patriot at the expense of less standard depth in the cargo area.
* The power of both vehicles was pretty equal but the Forester is much quicker to respond "off the line" (neither gets you off the line fast though). The Jeep in general felt sluggish but I think that was partly the CVT and partly the feel of the "Jeep" ride.
* Roof rack on the Forester is easier to reach.
* Forester comes ready for towing; Jeep needs tow prep, etc. -- Forester is also rated for higher towing capacity.
* Both are AWD -- if you really need 4x4 low option, then you'd probably need the Jeep. After conferring with numerous offroaders and people familiar with where we'd use our vehicle, we decided that for the 1% of the time we'd actually need that 4x4 low, we'd just rent a 4x4 for the day.
* Forester at this point has a pretty solid reputation; Patriot has little/no track record to compare
* Jeep has the new lifetime power train warranty; we opted to just buy an extended warranty for the Subaru
* Subaru is partial zero emissions (PZEV); Jeep's emissions are much higher
* Subaru's powered front seat (Premium Package) is nice
* Subaru's basic features (non-Premium Package) can only be had in the Jeep by adding various option packages
"In the end, we basically concluded although it was a little more expensive, the Subaru was just a much nicer vehicle and therefore the price tag difference made sense to us -- you probably get what you pay for."
"However, if I couldn't afford the Subaru, I would have been happy with the Jeep Patriot. If by chance you have offroad considerations, I found Youtube to be quite helpful. Search for Subaru Forester and there are many videos showing its offroad capabilities."
By the way, in terms of fitting the new car in the garage, John and I diligently reorganized our stuff, brought things to storage and made plenty of room. We thought that it would be tight, but it turned out that it was no tighter than with my Honda 1997 Accord. In fact, the Subaru is narrower, except for the large side mirrors that came with the premium package. The premium package is the way to go: heated front seats, electrical adjustable driver's seat, and more.
John's still getting used to driving it because it's much bigger than his old VW Jetta, but I can tell he enjoys the ride.
What are you driving, and why?
Tuesday, August 28, 2007
I Heart Indian Food: Samosas
Really, this one should be titled "Sammmmmmmmmmmosas" because they are just so tasty, the first thing I did when I tried the filling was say "mmmmmmmmmm."
Ironically, neither the filling, nor the pastry dough came from Indian food blogs, although the filling's recipe is credited to Savoring India by Julie Sahni (printed in the Williams-Sonoma spring catalog).
The pastry comes from Meg, at Too Many Chefs.
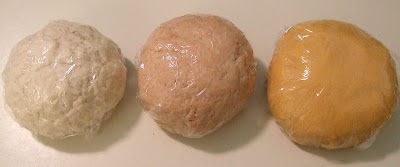
I pretty much doubled the recipe for the filling and made three different versions of the pastry dough, and still had leftover filling, which I froze for emergency samosa sessions.
Filling:
Ingredients:
1 1/3 lb russet potatoes boiled and mashed (leave somewhat lumpy)
Canola oil for frying + 2 tablespoons for sauteing spices.
1 small onion diced
1 garlic clove, minced
1 teaspoon garam masala
1/4 teaspoon cayenne pepper
3/4 teaspoon ground coriander
3/4 teaspoon ground ginger
1 1/4 teaspoon kosher salt
1 cup frozen peas, thawed
1 tablespoon fresh lemon juice (I actually omitted this, it was delicious without it)
Dough:
Ingredients:
1 1/2 cups flour (I made it three different ways, using whole wheat, white and chickpea flour--I wouldn't use the chickpea flour again for this purpose, but whole wheat and white worked very well)
6 tablespoons of plain yogurt (I used low-fat)
2 tablespoons melted butter
1/2 teaspoon salt
1/2 cup water (you may end up using more or less, depending on the humidity of your house)
Directions:
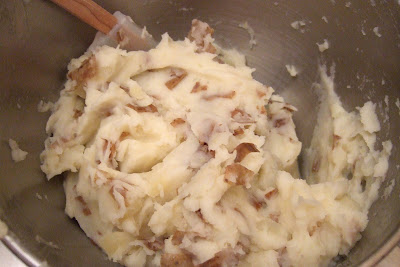
Make filling first. Remember to leave time to make the potatoes. I didn't skin mine.
1. In a very large skillet, warm the 2 tablespoons of oil, then add the onion. Cook for 5 minutes.
2. Add the garlic and cook 1 minute.
3. Add the spices (not the cilantro) and potatoes, mixing well. Cook for 5 minutes.
4. Add the peas, cilantro and lemon juice. Mix well, then cool completely.
Make the dough.
1. Mix the flour and salt, then add the butter.
2. Mix in the yogurt until it's well incorporated.
3. Add water until you get a nice, soft, elastic dough.
4. Knead for 5 minutes.
Here's where I deviated a tiny bit. I wrapped each version of my dough in plastic and let it rest for about 10 minutes while I cleaned up and let the samosa filling warm to room temperature. I'd made it the night before and chilled it in the fridge.
5. Pull a piece of dough off about the size of a golf ball. Roll it in your hands to get the round shape, then flatten it with your palm on a floured surface.
6. Using a rolling pin, roll it into a circle about 7-8 in. in diameter (I made mine in a variety of sizes just for fun). Cut the circle in half.
7. Wet your finger (keep a small bowl of water nearby for this, you'll need it.) and run it along the cut edge of one half moon of dough. Fold it so that the edge is sealed against itself, pressing down to help seal it.
8. Pick up the dough, which is now a cone, placing it your hand the way you'd hold an ice cream cone.
9. Fill your cone with samosa filling.
10. Dampen the edges of the top and seal it together, making sure there are no holes. Try to squeeze (gently) out all the air. Repeat until all the stuffing is used.
11. Heat your oil in the fryer or pan to 350 degrees F.
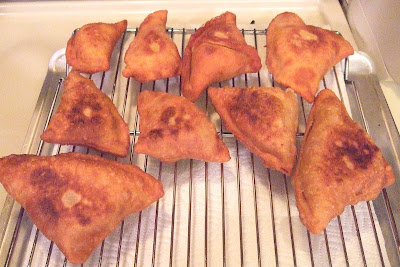
12. Fry your samosas until they're golden brown. It won't take long at all.
13. Drain on a rack over paper towels on a jelly roll pan.
Enjoy!
By the way, the color on the end photos is a bit off. They're definitely browner than red, but oh so yummy! I had enough to freeze, give some to friends and enjoy by myself. Just make sure they're completely cool before you freeze them. To heat the frozen ones, preheat your oven to 350 degrees F, and place them on an ungreased cookie sheet. Bake for 15 minutes, until sizzling hot.
I Heart Indian Food: Paneer and Okra Curry
I recently purchased a very well photographed Indian cookbook called Meena Pathak Celebrates Indian Cooking. The photo of her Paneer and Okra Curry was so colorful and tasty that I just had to make that the first recipe I tried.
Until making this dish, I had been an okra and paneer virgin in that I'd never cooked with either. I learned quite a bit about both from the experience. In another post, I'll make my own paneer. But for now, here's what I made from Mrs. Pathak's lovely book.
I'm not going to reprint her recipe in hopes that you actually purchase the book, but I'll tell you about how I made it.
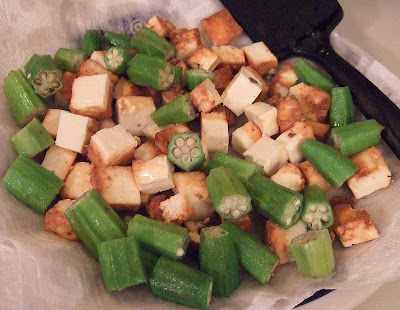
First, I cut a package of paneer (from my local Indian shop--that makes fantastic samosas, by the way) into 1 in. cubes and deep fried it in canola oil. What I learned about paneer is that you don't need to fry it for long before it starts getting really hard.
I drained the fried paneer (and yours should be golden brown, not dark brown like mine) on a plate with paper towels.
You'll see that some are half white still. Well, I didn't want them to turn into little rocks, so I pulled them out before they were entirely browned. I'll get the hang of this sooner or later. It's just my first time, so please don't be too hard on me. It also was the first time I deep fried using my dutch oven.
Next, I deep fried the okra for a few minutes and dried them with the paneer.
My favorite part comes next, making the masala. That was made with spices (cumin, ginger, chili powder, coriander and tumeric) mixed with onions, green chili peppers (I used serrano) and fresh chopped tomatoes. I sauteed them together until the tomatoes just stared to break down.
Then, I added water and cooked it for 10 minutes before adding the paneer and okra.
I checked the seasoning, added just a touch of salt and lime juice, then a little fresh cilantro before diving into a small bowl of this delicious meal.
It's best eaten right away, although it's alright the day after as well. And, despite overdoing it with the paneer, it was still one of the tastiest dishes I've made in a while.
I Heart Indian Food: Channa Saag
This recipe is actually a cheat. It's one for Saag Paneer (spinach with cheese), but at the time I made this dish, I didn't have paneer, the handmade Indian cheese on hand. However, I've been exploring the art of rehydrating dried beans as a way to lower sodium in my diet. Most canned beans (with the exception of Eden Foods organic no-salt added beans) contain a huge amount of sodium -- not good for folks with blood pressure issues or those of us trying to drop a few pounds.
So, I had beans on hand.
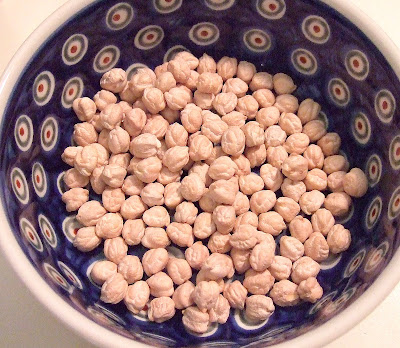
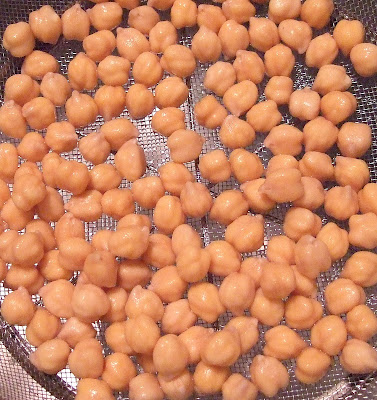
They took a while to rehydrate. I soaked them over night, drained the water, then cooked them in my dutch oven until they were al dente.
Then, I began the Channa Saag. This is very loosely based on the recipe for Saag Paneer at Indian Foods Co.
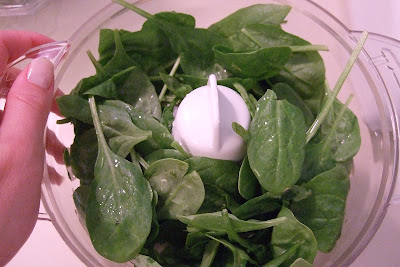
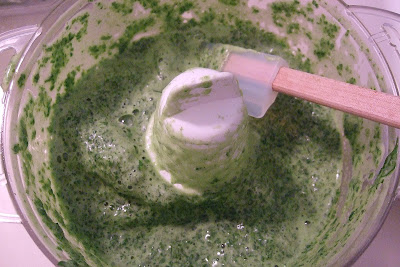
First, I pureed half of a pound of raw spinach with 1/2 cup of water in my food processor. I set the other half of the spinach aside for later.
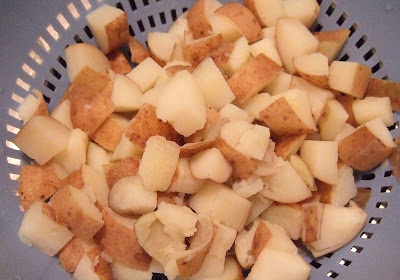
While I was preparing the spinach, I drained three pounds of potatoes I had boiled earlier. Prior to boiling, I'd cut the potatoes into 1/2 in. cubes.
I don't typically skin my potatoes, simply because I like how the skin tastes (and John's not picky about it), but feel free to skin yours.
Next, in a large skillet, I heated 3 tablespoons of grapeseed oil with 1 tablespoon of chopped ginger. Then, I added 1/2 a vidalia onion coarsely chopped, stirring until the onion turned translucent.
Next, I added 1 teaspoon each of cumin, garam masala, coriander and turmeric. I also added 1/2 teaspoon of salt. I cooked the spices together for about 3 minutes, then added all the spinach, the beans and the potatoes to the skillet.
I simmered this for about 20 minutes, until the house smelled fantastic and John came home from work hungry.
We enjoyed it as it was the first night, but we decided to make it more like how we've received it in restaurants when it came to the leftovers. For those, I fished out the chunks of potatoes, then put the rest in the food processor to completely puree. Then, I lightly browned the potatoes in oil and garam masala for about 5 minutes before adding the pureed channa sag and cooking for about 15 minutes. It was far better the second time around. The next day, with leftover naan, it was even further improved. How it kept getting better with time is beyond me, but it was definitely something we'd make again.
Delicious and good for you!
Sunday, August 26, 2007
I Heart Indian Food: Naan
I've really been on an Indian food kick. From yesterday's fantastic dinner with friends at Udupi Village in Montclair, to the 50 or so samosas I've made in the past few days, I can't get the fragrances and tastes of cumin and garam masala out of my system.
There are so many lovely Indian cooking blogs out there that it's hard to select favorites, but some that I recommend are:
Naan
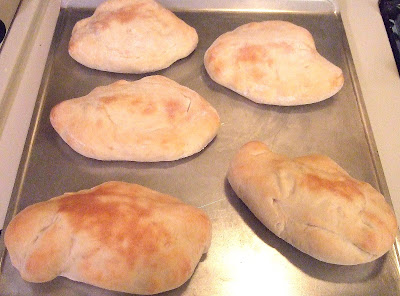
One of the things John and I really enjoy about eating at Indian restaurants is the bread selection. I've always wanted to learn how to make naan bread, but having no Tandori oven, I didn't think I'd be able to make it how we enjoy it in the restaurants. I was right, however, the naan that I did make turned out to be one of John's favorites so far.
The recipe I used originates at Gourmet Indian. I made a pretty significant alteration, using bread flour for regular all-purpose flour.
That's probably why I got what seems to be an ideal pizza dough instead of authentic naan. The recipe also calls for "salt to taste." Here, it's important to actually have a measurement when making bread. I guessed at 1/2 teaspoon. It needs a little more. Additionally, I used agave nectar for the sugar and canola oil for the butter.
Here's the recipe as I did it:
Yields 7 large loaves (loaves = 7 in. long x 3-4 in. wide)
Ingredients:
3 1/2 cups bread flour
1/2 cup low-fat yogurt
1 egg
1/4 cup canola oil
1/2 teaspoon salt (more to your taste)
3 teaspoons agave nectar
3/4 cup water (you may end up using less, depending on the humidity in the air)
1 2/3 tablespoon yeast
Directions:
1. Mix 5 tablespoons of the water, the yeast and a teaspoon of agave nectar together until well blended.
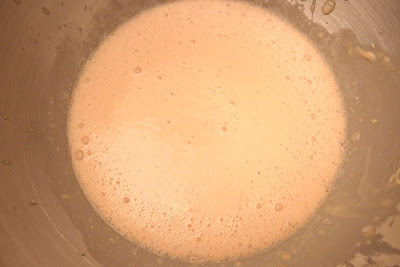
2. Set aside for 10 minutes while the yeast feeds on the sugar of the agave. It will foam up during that time.
3. Add the remaining water, agave nectar, yogurt, egg, canola oil and salt, and stir well.
4. Add the flour and mix until it makes a smooth, soft, elastic dough. If you're using an electric mixer, change to the dough hook when it gets too difficult to mix. It should take about five minutes.
5. Take the dough out of the bowl and wrap it in plastic while you wash the bowl in warm water and dry it. Oil the bowl lightly and place the dough back in the bowl, using the plastic to cover the bowl. Let it rest in a warm place until the dough doubles in size.
6. Preheat the oven to 425 degrees F. Shape the dough into 8 even balls. Flatten them into circles with your fingers, much like pizza dough, so that the edges are thicker than the middle. Pull one side out so that it becomes an oblong shape.
7. Place the naan loaves on two ungreased cookie sheets and bake for 10-15 minutes until golden brown.
Naan innards, for Robyn, because she loves innards so:
There are so many lovely Indian cooking blogs out there that it's hard to select favorites, but some that I recommend are:
- Mahanandi
- Virundhu
- Cookery Corner
- Food Blog Desam (not a blog, but an aggregator of great food blogs)
Naan
One of the things John and I really enjoy about eating at Indian restaurants is the bread selection. I've always wanted to learn how to make naan bread, but having no Tandori oven, I didn't think I'd be able to make it how we enjoy it in the restaurants. I was right, however, the naan that I did make turned out to be one of John's favorites so far.
The recipe I used originates at Gourmet Indian. I made a pretty significant alteration, using bread flour for regular all-purpose flour.
That's probably why I got what seems to be an ideal pizza dough instead of authentic naan. The recipe also calls for "salt to taste." Here, it's important to actually have a measurement when making bread. I guessed at 1/2 teaspoon. It needs a little more. Additionally, I used agave nectar for the sugar and canola oil for the butter.
Here's the recipe as I did it:
Yields 7 large loaves (loaves = 7 in. long x 3-4 in. wide)
Ingredients:
3 1/2 cups bread flour
1/2 cup low-fat yogurt
1 egg
1/4 cup canola oil
1/2 teaspoon salt (more to your taste)
3 teaspoons agave nectar
3/4 cup water (you may end up using less, depending on the humidity in the air)
1 2/3 tablespoon yeast
Directions:
1. Mix 5 tablespoons of the water, the yeast and a teaspoon of agave nectar together until well blended.
2. Set aside for 10 minutes while the yeast feeds on the sugar of the agave. It will foam up during that time.
3. Add the remaining water, agave nectar, yogurt, egg, canola oil and salt, and stir well.
4. Add the flour and mix until it makes a smooth, soft, elastic dough. If you're using an electric mixer, change to the dough hook when it gets too difficult to mix. It should take about five minutes.
5. Take the dough out of the bowl and wrap it in plastic while you wash the bowl in warm water and dry it. Oil the bowl lightly and place the dough back in the bowl, using the plastic to cover the bowl. Let it rest in a warm place until the dough doubles in size.
6. Preheat the oven to 425 degrees F. Shape the dough into 8 even balls. Flatten them into circles with your fingers, much like pizza dough, so that the edges are thicker than the middle. Pull one side out so that it becomes an oblong shape.
7. Place the naan loaves on two ungreased cookie sheets and bake for 10-15 minutes until golden brown.
Naan innards, for Robyn, because she loves innards so:
Saturday, August 25, 2007
Baking and Books Blogger Raises Funds for Organic Farming and Other Environmental Causes
Ari, at Baking and Books blog, is reaching out to fellow bloggers and food folks to raise money for the Hazon organization. Hazon uses Community-Supported Agriculture programs and bike rides to accomplish its vision: "to create a healthier and more sustainable Jewish community -- as a step towards a healthier and more sustainable world for all."
Ari is offering a raffle (the prizes are top cookbooks!) to support a Hazon bike ride taking place in New York City during Labor Day weekend. Here's where the money goes (from the Hazon site):
So, participate in the raffle, you might win a collection of cookbooks, you might not. Either way, it's a great cause to support.
Ari is offering a raffle (the prizes are top cookbooks!) to support a Hazon bike ride taking place in New York City during Labor Day weekend. Here's where the money goes (from the Hazon site):
- 30% is awarded as grants to external organizations. Some of the external grantees include the Adamah fellowship which is training a new generation of Jewish organic farmers and activists, and the Arava Institute for Environmental Studies – the pre-eminent professional leadership program for environmental leaders in the Middle East; AIES students who are Palestinian, Jordanian and Israeli will be at the New York Ride.
- 50% funds Hazon's year round programs, including Tuv Ha’Aretz, Hazon’s Community-Supported Agriculture (CSA) initiative and the Hazon Food Conference.
- 20% helps cover the costs of the ride
So, participate in the raffle, you might win a collection of cookbooks, you might not. Either way, it's a great cause to support.
Sunday, August 19, 2007
Making Grandma's Zucchini Pie My Own
If there's any question where my cooking/baking gene came from, one need look no farther than my father's mother, Grandma Jean. Growing up, my brother and I would fly down (or drive with my father) to Florida to visit his parents. Grandma would invariably send us home with freshly made blintzes, marble cake and other delicacies. She would trick me into eating fish by covering it in tomato sauce and sprinkling it with mozzarella cheese.
When my grandfather died in March, John and I flew to Florida for the funeral. After the mourners had left and I had a moment of Grandma Jean's time, I felt that maybe she wanted to talk about something else. She did. We talked about cooking, and she asked me to take down her recipe box for a look at some of her gems.
My father had bought a copier/fax/printer for Grandma's house some time ago, when he was spending extended days/weeks with his parents and needed to move documents around. I took advantage of the machine and photocopied a few of my favorite Grandma Jean recipes. True to form for ladies of her age group (in their 90s), many important items were left out of the recipes as well as directions.
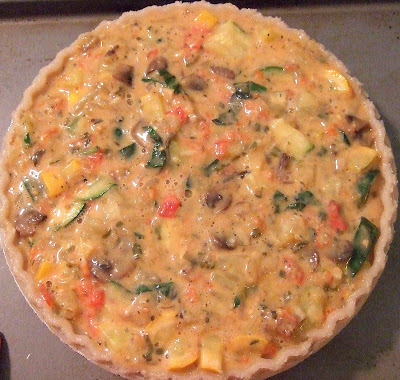
As I read over her recipe for Zucchini Pie, I discovered that I'd have to punt. Here's the recipe as best as I could piece it together, with some additional ingredients and a change in the cheeses. Also, in her original recipe, she used the refrigerated dinner rolls that come in a tube. I used a pre-baked pie shell. If you're making your pie from scratch, just remember to prebake your pie crust since this is more like a vegetable quiche than anything else.
All I can say about the veggie pie is that it's very tasty, easy to make, and a big hit with visitors. Thanks Grandma Jean!
Ingredients:
1/2 vidalia onion, coarsely chopped
2 scallions, sliced thinly
5 medium-sized mushrooms, sliced
1 shallot, chopped
2 garlic cloves, chopped
2 plum tomatoes, chopped
1 summer squash, chopped
1/2 large eggplant, cubed
1 cup shredded cheddar cheese
1 cup shredded monterey jack cheese
2 eggs beaten well
3 tablespoons oil
1/2 teaspoon salt
1/2 teaspoon freshly ground pepper
1/2 teaspoon fresh basil leaves, sliced thinly
2 teaspoons mustard
1 cup chopped zucchini, with skin
1 pre-baked pie shell
Directions:
1. Preheat oven to 375 degrees F.
2. In a large skillet, heat the oil and the spices (except the basil) together for 2 minutes on medium.
3. Add the garlic, shallot, scallions and onions and sweat until the onions are translucent.
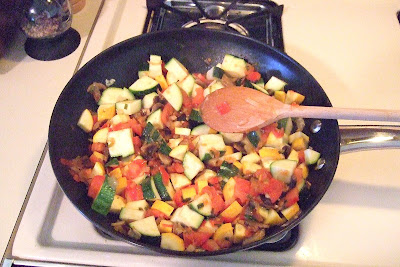
4. Add the mushrooms and plum tomatoes, cooking until the tomatoes just start to break.
5. Add the rest of the vegetables and cook until they are tender. Let cool for 10 minutes.
6. In a large bowl, beat the eggs and mix in the shredded cheese.
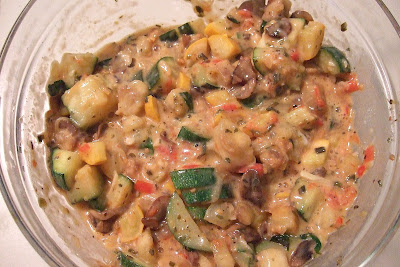
7. Add the cooked vegetables and the basil to the egg mixture and mix well.
8. Pour the mixture into your pie shell and bake until it forms a crust on top. Cover the edges with foil, if the edges get too brown.
Cut into 12 pieces and enjoy!
Thursday, August 16, 2007
Paul McCartney Nearly Chops Off a Finger
Yet another celebrity who wants a cooking show.
Monday, August 13, 2007
Asparagus Goat Cheese Black Bean Tart
In the beginning of the month, I did a lot of baking and cooking for Mom's annual family party. One of the recipes is based very loosely on the Garlic and Basil Chickpea Tart of Roy Guste's The Bean Book. It's based so loosely on it in fact that I'd hardly call it the same at all.
I used 1 lb of black beans that I had soaked and cooked, then pureed to make the tart shell. In the future, I will add complementary spices to the beans before pressing them into the tart pans. By the way, they worked spectacularly well as tart shells. Flaky, like the best dough, yet much more healthy and interesting.
The filling is purely my creation -- goat cheese mixed with sun-dried tomatoes and fresh basil. That was wonderful. I should have kept some to spread on crackers or bread, it was so yummy.
Finally, I topped the tarts with asparagus I'd sauteed in olive oil with shallots, and pine nuts. The result was that the beans could have been more seasoned, but the topping was great. Lessons learned. Regardless, they were a hit with my aunt and step-uncle (who wanted the recipe). So, here's a short film about how I made the tarts.
Labels:
asparagus,
deb schiff,
tart
Wednesday, August 08, 2007
U.S. Presidential Candidates
At first, I thought Christopher Walken was the candidate for me. Then, John told me it was only satire. I was depressed for about an hour. Not only that, the barrage of debates, interviews and general spin on topics began to give me a headache.
Then, this morning, I was reading Colin's blog (as I do each morning) and saw that he was fortunate enough to interview John Edwards on a variety of environmental and sustainability issues. I am not naive. I don't believe that every campaign promise will be fulfilled, nor do I believe that the interview responses were written solely by John Edwards. That's why campaigns have PR people.
However, I really liked his responses. It speaks to me that he wants to hold automakers accountable for raising mpg numbers to a sane amount (40 mpg) in 7 years.
I'd be interested to see how/if the other candidates respond to Colin's well-thought-out questions. If you've never stopped by No Impact Man, you should definitely pay him a visit today.
And, yes, I'll be back to posting about food very soon. Several recipes, a couple of wee films and more.
Subscribe to:
Posts (Atom)